Thursday, August 13, 2009

Simple Lumber Rack Plans

I finally built myself a simple but effective lumber rack system. I built it entirely out of 2x4's and it took me probably three hours to complete, not to bad by myself. It is large enough to store 12' long boards, and plenty of them!


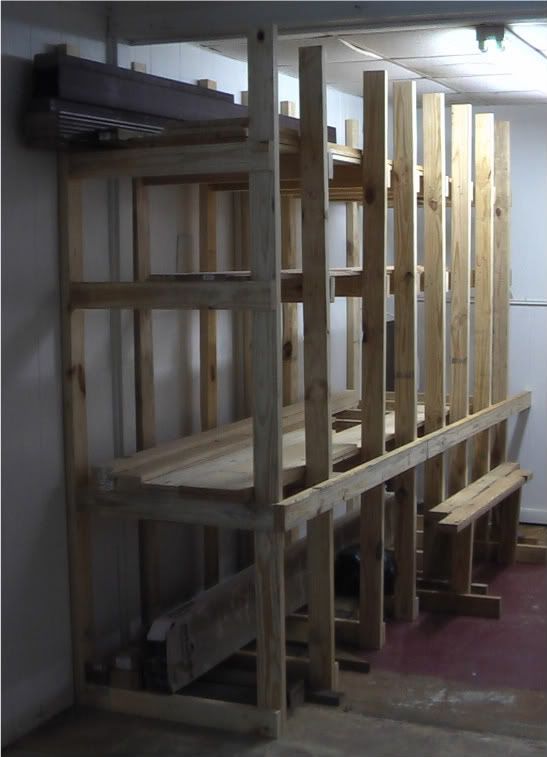
The way it is designed, the lumber is supposed to be slid in and out on end. This works perfect in my shop because it is shaped like a "L". The lumber rack is right on the top of the bottom, flat part of the "L". It was definitely the best spot for my lumber rack and I will go into more detail of why in a later post.


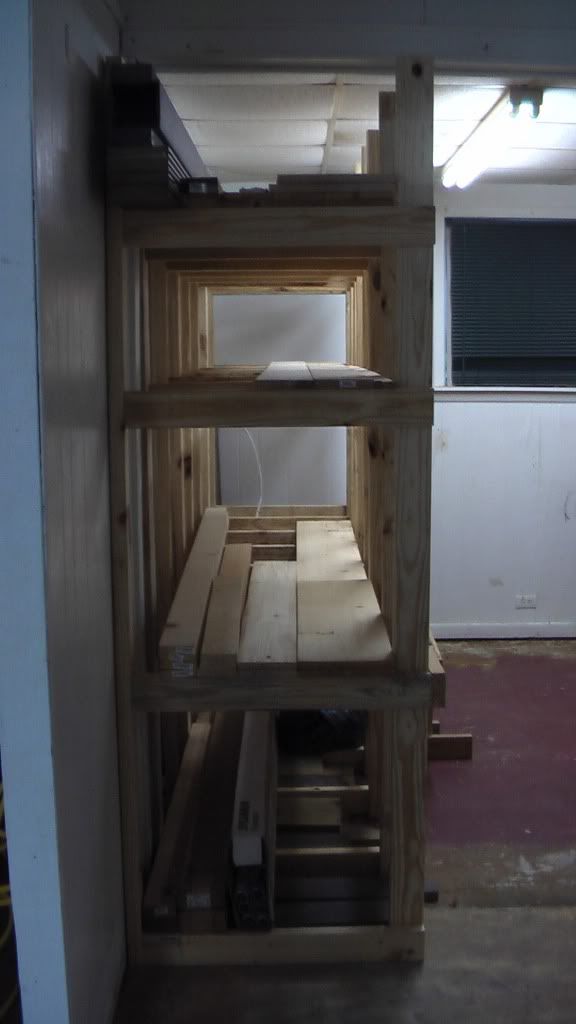
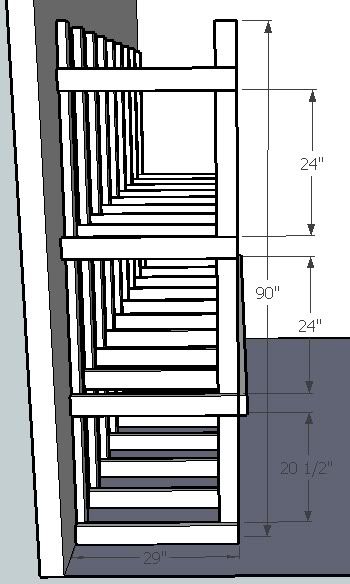
I have drawn a little set of plans on sketchup that better shows how it was put together. I built each unit with pine 2x4's and I nailed them together on the floor with a pneumatic nail gun using some old ring shank nails that I had laying around. You can use screws if you want to take the time but I think the ring shank nails will hold just about as good as a screw would. I spaced the units 16" apart to provide plenty of supports for my lumber to lay flat on and not bow. When you space them 16" apart this lets you nail each on into a stud in the wall which is needed to hold them up. I put one board down the outside of every unit to hold them all together, also it is a just the right height for a small counter top down that side. (I plan on covering the lumber rack and using the rest of the area as a finishing room and the shelf will give me somewhere to set finishing supplies.)


This was a great addition to my shop and really helped me get organized!

Wednesday, August 5, 2009

Homemade Cornhole Boards

Just today, I finished building my third set of cornhole boards. The first two sets that I built were for myself and the third set is for a freind who is also addicted to cornhole on Friday and Saturday nights.


The boards are made of 5/8" plwood trimmed in 3/4" select pine grade boards with 3/4" oak legs. I used pockethole-joinery to join the pine to the plywood and screws to attach the hinges and the legs. Glue was used on all joints.

The first two sets of cornhole boards I made where not as good of quality as these boards are. I used 3/4" plywood and 3/4" pine for the first set but I didn't join the pine to the plywood flush with the top like I did with these boards, that should make the edges of the board more durable and it looks great also. Also I just screwed the top down into the pine framing leaving the screws exposed in the top of the boards. On my first set I used a simular hinge setup for the legs which never gave me any trouble.

On the second set I build I used some scrap pine 1x12's that I had laying around and I biscuited them together since I had just purchased my first biscuit jointer. This worked fine but I was learning the biscuits and my joints weren't perfectly flush. For the legs I bolted through the 1x4 pine framing, that again wasn't mounted flush with the top of the board, and into the legs that pivoted on the bolt. This method was agrivating because you would have to tighten the wingnut on the legs very tight to make them stay put during gameplay (even then they would close up little by little with each through of a cornhole bag.

So I think I finally did it right this time joining the pine framing flush with the top of the plywood board and hiding all my joinery with pockethole screws. Using oak for the legs should be an improvement also. I really like the hinges and they are good heavy duty ones too. The legs don't slowly fold in on you like the bolted legs because the angle at which they sit is close to 45 degrees.


These are some great boards, I will have to build a set like these for myself! I think I will take photos or maybe video the building process to post on the internet too.