I built this wonderful built in closet for my son. It's great efficient use of space with lots of storage compared to what used to be here, a desk.
Check out the video and be sure to check out my Youtube channel - https://www.youtube.com/user/SailingandSuch

Friday, November 22, 2013
Friday, October 11, 2013
1st Vlog! HGTV Hosting Opportunity
Thank you all for watching! More woodworking videos coming soon, don't worry.
(this video isn't shown on my Youtube channel, I'm not sure if I want to "clutter" it up with vlogs...)
Thursday, October 18, 2012
Simple Router Dado Jig Video
It seems I was in need of a dado jig for my router for some upcoming projects, so I decided to put one together and share it with other woodworkers. I hope you enjoy my short and to the point video!
Wednesday, September 19, 2012
The Ultimate Shop Stool
Check out this easy to build shop stool! Not only is it a great place to sit in the woodworking shop but it also can serve as an extra hand for great outfeed support.
These plans used to be free but now they charge for them! How silly?!?! I'm so sorry everyone but maybe I can get another video out describing the dimensions and things in more detail? click here to go to American Woodworker's page on it.
These plans used to be free but now they charge for them! How silly?!?! I'm so sorry everyone but maybe I can get another video out describing the dimensions and things in more detail? click here to go to American Woodworker's page on it.
Tuesday, September 4, 2012
How to build a Folding Stick Chair
Draft
This chair is a fairly simple build, although it does take a fair amount of time to cut the parts and drill the holes in all of them, but after that's done it's pretty simple. The design sparked my interest and I figured I would make one or two of them, I'm glad I did, they turned out great!
IMG of Chair
There are plans for this chair in a few places online, some will cost you some will be free but are difficult to understand or navigate through due to ads and whatnot. I hope to provide you with a straight forward and easy to follow how to guide!
Have a look at my short video to get the what all the project entails and understand how everything works. You will find the details and dimensions of the pieces below the video.
All of the pieces are cut out of 2x4 stock, they are all 1 1/4" x 1 1/2".
All holes are drilled on the wider 1 1/2" side of each piece and also centered across the piece.


Thursday, August 9, 2012
Easy Door Frame Rot Repair
My future father-in-law's back door was starting to rot at the bottom and he asked me about it. He said he wanted to know if he needed a whole new door. I told him I could just patch it up with some epoxy putty and he looked at me a little funny. Once the job was done, he was pleasantly surprised at how good it looked and he was surely glad he didn't have to buy a new door.
I made a video on the method I used, maybe you could use it too!
I made a video on the method I used, maybe you could use it too!
Thursday, July 26, 2012
Drawer Dividers DIY - Simple
I have used these drawer dividers in my shop for a while now and they work great. Thought I would share them in a video!
Saturday, April 14, 2012
Video on my Drawer Storage Unit Frame
I had some of my Youtube viewers and subscribers asking about some specifics on my drawer storage unit and the dimensions so I went ahead and made a quick video out of it.
Monday, February 13, 2012
Installing a Router Plate in a Router Table
Since I did a video on my Mobile Router Table one of my Youtube subscribers asked me to do a video showing how I cut the hole for the router plate to sit down into. Have look and see how it's done!
The router plate I used is a Kreg Precision Plate and it's probably one of the best router plates out there for the best price, alot of positive reviews on it. Any other router plate would install basically the same way though.
Details on the Leveling Screws-
To install the leveling screws, just drill a hole a little smaller in diameter than the bolt itself and then carefully thread the bolt into the hole. The threads of the bolt should grab onto the wood and hold fairly well, if it goes out of wack it's simple to adjust later. Any size screw will do, I just used some spare ones's I have laying around.
Thanks for visiting and be sure to come back for more!
Saturday, February 11, 2012
Drawer Storage Unit in my Woodworking Shop
I had one of my Youtube subscribers request that I do a video on my drawer storage unit that he spotted in one of my other videos. I was happy to do the video for him and it turned out well and gave me an idea or two for future videos!
This thing is great for storage and I like the small, shallow drawers the best because it seems like it's the small stuff that gets layed down everywhere in the shop where you can't find them when you need it. Well, the small drawers give you a place to put this suff.
Thanks for watching! If you want to see more of my videos CLICK HERE.
Saturday, February 4, 2012
My Mobile Router Table Video
I had one of my Youtube subscribers request that I make a video about my mobile router table that he spotted in my shop tour video. It's a simple video but it gets the basics across for this easy to build router table.
Friday, February 3, 2012
Simple Garage Shelving Unit
I have been working a lot lately trying to straighten up our garage. When I first started there was quite a bit of clutter everywhere, slowly but surely I have been getting things in order and throwing out quite a bit of "trash" that my stepfather had collected over the years. One thing that was posing a problem is that there were not any small, shallow shelves to store spray paint, oils, and other liquids, mostly we have shelves that are about 2' deep which is way to deep and causes you to loose things easily.
I saved some scrap lumber from a remodeling job that I was working on last week figuring it would be perfect for some shelves. I was right, these shelves didn't cost me anything but time and I have enough scrap to make a least 2 more units.
Have a look!
This was an easy project that anyone should be able to pull off in an afternoon or even an hour. Be sure to check out my other videos. If you have any questions, comments or suggestions feel free to let me know.
Saturday, January 28, 2012
DIY Drill Charging Station
{EAV:c37991ac4872e97e}
I finally decided to get busy on my Drill Charging Station, one more woodworking project that would help me organize my shop some more. It came out wonderfully and was actually really easy to do.
Here are the dimensions of the main pieces for those who are interested.
Bottom- 7 ¾” x 19”
Back- 10 ¼” x 19”
Sides- 11” x 7 ¾”
Inside Dividers- 7” x 10 ¼”
Shelf- 6 ½” x 10 ½”
I left about 3 ½” in the slot for the drills to drop down into. The wires just bunch up behind it and stay pretty well since the French cleats put pressure against the wall holding them there.
If anyone has and questions feel free to let me know.
Don’t forget to check out Will Ellis too! http://www.o2thinkbig.co.uk/Projects/Project-Home/?clubId=1739
Monday, January 23, 2012
My French Cleat System
Check out my french cleat system in my woodworking shop. It's a fabulous way to hang things on the wall and the storage options for a small or large shop are endless with this system, use your imagination!
Thanks for watching, click on the"Videos" link on the left side of the page for more!
Sunday, January 15, 2012
My Woodworking Shop Tour
I figured I would do a little shop tour video for everyone! I know I enjoy seeing other people's shops to get ideas and learn what works for them so that maybe I can make my workspace a little better.
I know I really ejoy showing my small woodworking shop to any guests we may have over, I love explaining what each tool does and how and why I built my different jigs, storage systems, and shop furniture things. Maybe my video gave you some inspiration or an idea of a way you can improve your small shop.
If anyone has any questions please feel free to let me know and I will be happy to answer them!
Saturday, December 31, 2011
Simple Drawer Making - A How To Video
I was making some drawers the other day for a couple of vanities when I got the idea to make a video on how I build my easy - simple drawers in my woodworking shop. This method doesn't use and complicated joinery or any specialized tools. If you have every feared making drawers like I once did then try this route and you should be able to take drawers on easily.
Thank you all for watching!
Wednesday, February 9, 2011
Tool Review - Hitachi 2" Brad Nailer
Here is a quick review of my Hitachi 2" Brad Nailer, NT 50AE2. Figured I would try a tool review video and see how it turned out, overall I think it went pretty well.
If anyone has spotted any other tools in my videos that they would like to see a review done on just let me know, I'd be happy to do another.
If anyone has spotted any other tools in my videos that they would like to see a review done on just let me know, I'd be happy to do another.
Monday, February 7, 2011
How to build a Lumber Rack Video- Better than free plans!
I definately needed a lumber rack in my new small shop so I got to looking around the internet at other people's ideas and builds and most of them seemed pretty complicated or they protruded out from the wall to much for my small shop.
I came up with a simple but strong design that doesn't force you to sacrifice space nor does it take alot of tools, materials, or complicated jointery to build. In my small shop I am trying to put alot of things on wheels and this lumber rack is not built all the way to the floor so that I can roll tools underneathe it.
So take some time to watch this video and build yourself a great lumber rack.
I do consider this a meduim duty lumber rack but you could easily add two more uprights with supports between these making them 16" on center rather than my 32" on center. This would add alot of extra strength is you decided to load it up excessively.
Monday, January 17, 2011
The New Shop Pt. 2 Moved In
This past week I have been working hard and I have most of my tools moved into my new shop space, it's so exciting! First I insulated the walls then put 1/2" plywood up. After that I painted the plywood white with a eggshell latex paint which really made the shop brighter and appear larger after two coats (I still have some touching up to do, but I wanted to get my tools in there).


It feels so good to get my tools in there!
The next few things I am working on are my french cleat system and my lumber rack. I am putting french cleats where ever I can and hanging whatever I can on them. This way everything in my shop can be moved around without much trouble with the only things being permanent on the wall are the lumber rack and the ladder to the attic. You can see where I have already hung a small cabinet and a clamps on my french cleats. The clamps had no where to hang and were taking up valuable space rght off so I made up a quick holder for them. Also, I needed a place to put some fasteners so I made up the small cabinet to hold my hardware.
My lumber rack will be located above the jointer and my unfinished router table. I am making it out of 2x4's and 1/2" plywood, it is pretty simple but should do the job nicely.
Moving into my new shop I will be building lots of new shop furniture and jigs, most of which I will try to make videos on. This afternoon I hope to be able to complete my lumber rack and have a tutorial video made and uploaded by Wednesday. I already have all of the parts cut for the rack I just have to get to videoing!
Tuesday, January 11, 2011
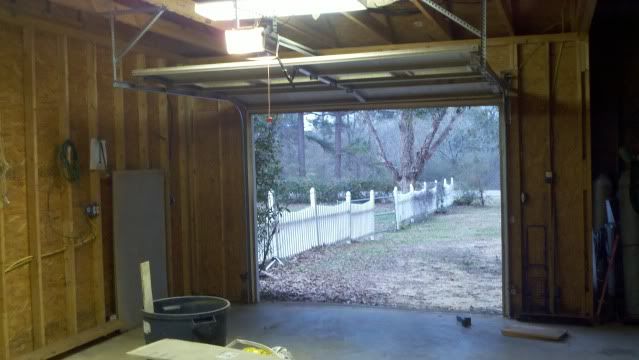
The New Shop! Pt. 1
I am loading up my shop and moving it to a new home! Well, not yet, but I am getting close!
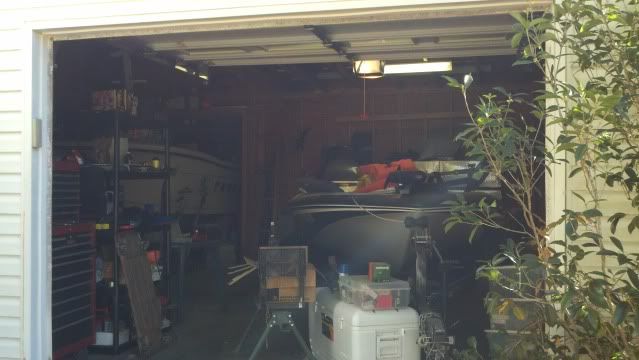
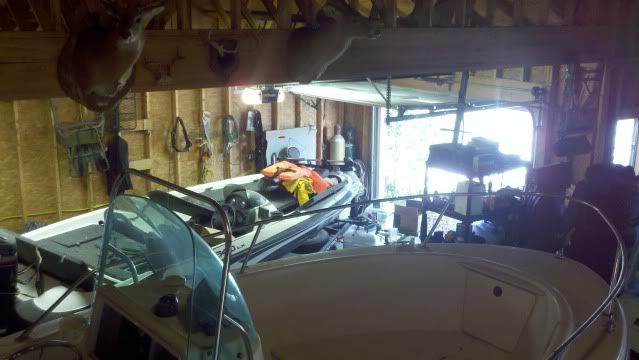
I have decided to move my shop to my home, since I have had a break-in and having a shop at home would be so nice (having to drive 20 minutes to my shop makes me spend less time there). The plan is to moving into a bay of our "boat barn", it is a larger garage if you will that is approximately 30'x60' and has a two boats, fourwheelers, a golf cart and a bunch of my step father's junk, yes, most of it is junk. Sadly I couldn't convince him to give me the whole thing, so I settled with one bay of it a 13.5'x25' section.


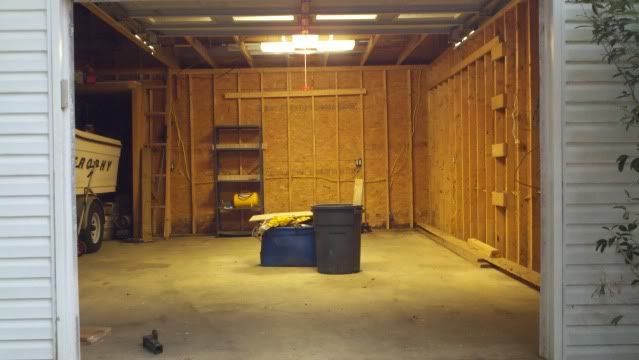
As you can see, it is pretty full. Most of the barn is this way, I think my stepdad is a mild hoarder..... alot of the stuff is... well I won't go there. I got him in there with me Sunday afternoon and consolidated all of the things into the other parts of the barn. Our agreement was that I could get 100% of his stuff out of that bay and have only my things over there. It took us probably a good hour to move it all, when we were done it was looking good.


My plans are to close it off completely from the rest of the barn with a nice wall. I want to insulate it, hang 1/2" plywood all along the walls, paint it white, then move all my tools in and build something! More to come!
Feel free to "Follow" along with me, this should be exciting! Look in the right column for "followers" and click follow.
I have decided to move my shop to my home, since I have had a break-in and having a shop at home would be so nice (having to drive 20 minutes to my shop makes me spend less time there). The plan is to moving into a bay of our "boat barn", it is a larger garage if you will that is approximately 30'x60' and has a two boats, fourwheelers, a golf cart and a bunch of my step father's junk, yes, most of it is junk. Sadly I couldn't convince him to give me the whole thing, so I settled with one bay of it a 13.5'x25' section.
As you can see, it is pretty full. Most of the barn is this way, I think my stepdad is a mild hoarder..... alot of the stuff is... well I won't go there. I got him in there with me Sunday afternoon and consolidated all of the things into the other parts of the barn. Our agreement was that I could get 100% of his stuff out of that bay and have only my things over there. It took us probably a good hour to move it all, when we were done it was looking good.
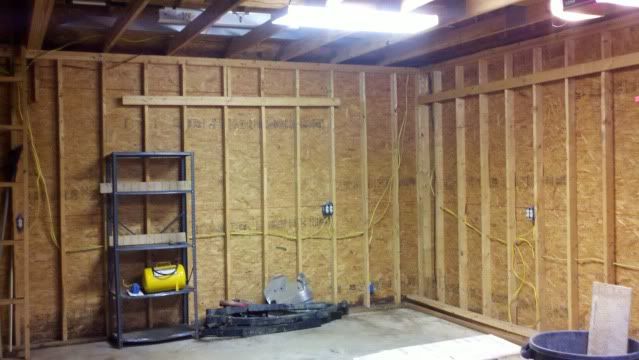
My plans are to close it off completely from the rest of the barn with a nice wall. I want to insulate it, hang 1/2" plywood all along the walls, paint it white, then move all my tools in and build something! More to come!
Feel free to "Follow" along with me, this should be exciting! Look in the right column for "followers" and click follow.
Subscribe to:
Posts (Atom)