I definately needed a lumber rack in my new small shop so I got to looking around the internet at other people's ideas and builds and most of them seemed pretty complicated or they protruded out from the wall to much for my small shop.
I came up with a simple but strong design that doesn't force you to sacrifice space nor does it take alot of tools, materials, or complicated jointery to build. In my small shop I am trying to put alot of things on wheels and this lumber rack is not built all the way to the floor so that I can roll tools underneathe it.
So take some time to watch this video and build yourself a great lumber rack.
I do consider this a meduim duty lumber rack but you could easily add two more uprights with supports between these making them 16" on center rather than my 32" on center. This would add alot of extra strength is you decided to load it up excessively.

Showing posts with label Lumber Storage Rack. Show all posts
Showing posts with label Lumber Storage Rack. Show all posts
Monday, February 7, 2011

Thursday, August 13, 2009
Simple Lumber Rack Plans
I finally built myself a simple but effective lumber rack system. I built it entirely out of 2x4's and it took me probably three hours to complete, not to bad by myself. It is large enough to store 12' long boards, and plenty of them!

The way it is designed, the lumber is supposed to be slid in and out on end. This works perfect in my shop because it is shaped like a "L". The lumber rack is right on the top of the bottom, flat part of the "L". It was definitely the best spot for my lumber rack and I will go into more detail of why in a later post.

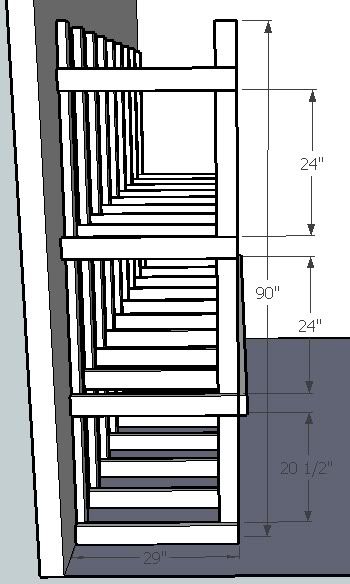
I have drawn a little set of plans on sketchup that better shows how it was put together. I built each unit with pine 2x4's and I nailed them together on the floor with a pneumatic nail gun using some old ring shank nails that I had laying around. You can use screws if you want to take the time but I think the ring shank nails will hold just about as good as a screw would. I spaced the units 16" apart to provide plenty of supports for my lumber to lay flat on and not bow. When you space them 16" apart this lets you nail each on into a stud in the wall which is needed to hold them up. I put one board down the outside of every unit to hold them all together, also it is a just the right height for a small counter top down that side. (I plan on covering the lumber rack and using the rest of the area as a finishing room and the shelf will give me somewhere to set finishing supplies.)

This was a great addition to my shop and really helped me get organized!
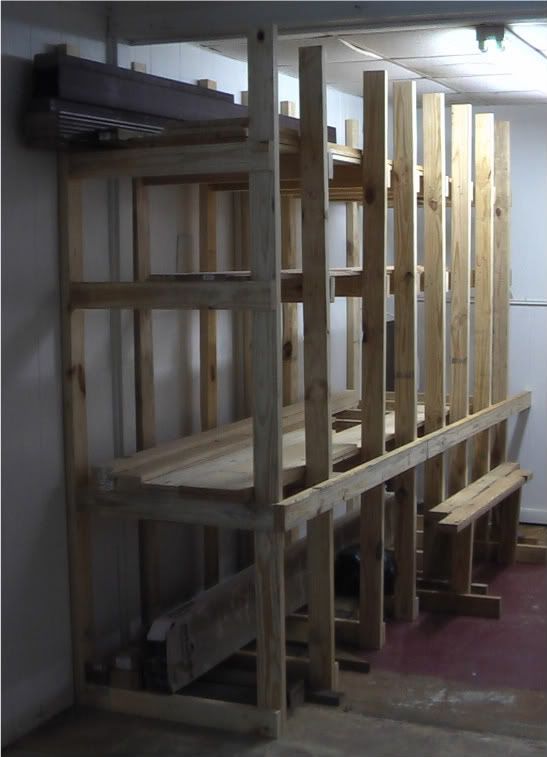
The way it is designed, the lumber is supposed to be slid in and out on end. This works perfect in my shop because it is shaped like a "L". The lumber rack is right on the top of the bottom, flat part of the "L". It was definitely the best spot for my lumber rack and I will go into more detail of why in a later post.
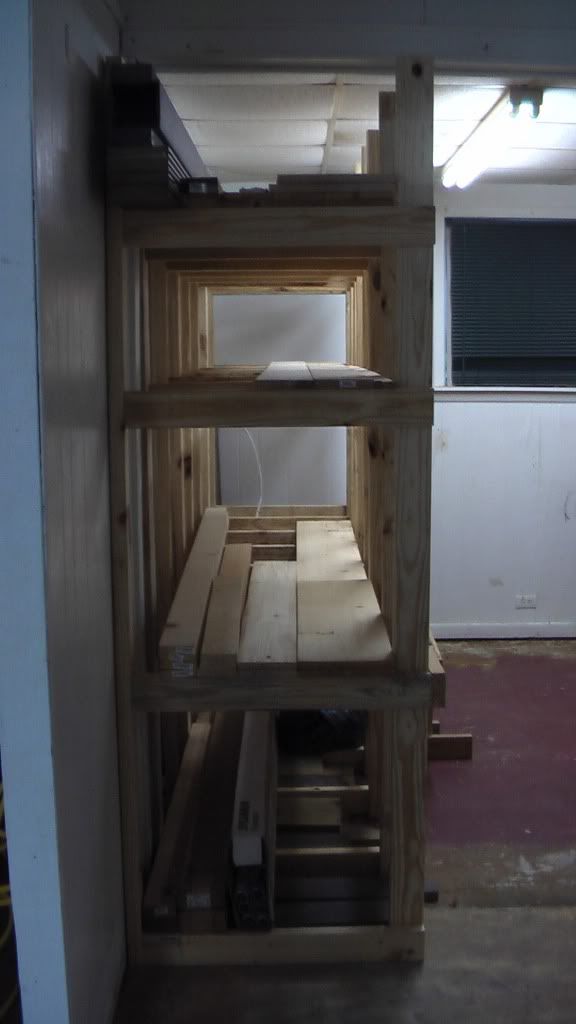
I have drawn a little set of plans on sketchup that better shows how it was put together. I built each unit with pine 2x4's and I nailed them together on the floor with a pneumatic nail gun using some old ring shank nails that I had laying around. You can use screws if you want to take the time but I think the ring shank nails will hold just about as good as a screw would. I spaced the units 16" apart to provide plenty of supports for my lumber to lay flat on and not bow. When you space them 16" apart this lets you nail each on into a stud in the wall which is needed to hold them up. I put one board down the outside of every unit to hold them all together, also it is a just the right height for a small counter top down that side. (I plan on covering the lumber rack and using the rest of the area as a finishing room and the shelf will give me somewhere to set finishing supplies.)
This was a great addition to my shop and really helped me get organized!
Subscribe to:
Posts (Atom)