Monday, January 17, 2011

The New Shop Pt. 2 Moved In

This past week I have been working hard and I have most of my tools moved into my new shop space, it's so exciting! First I insulated the walls then put 1/2" plywood up. After that I painted the plywood white with a eggshell latex paint which really made the shop brighter and appear larger after two coats (I still have some touching up to do, but I wanted to get my tools in there).

Photobucket

Photobucket

Photobucket

Photobucket

Photobucket

Photobucket

It feels so good to get my tools in there!

The next few things I am working on are my french cleat system and my lumber rack. I am putting french cleats where ever I can and hanging whatever I can on them. This way everything in my shop can be moved around without much trouble with the only things being permanent on the wall are the lumber rack and the ladder to the attic. You can see where I have already hung a small cabinet and a clamps on my french cleats. The clamps had no where to hang and were taking up valuable space rght off so I made up a quick holder for them. Also, I needed a place to put some fasteners so I made up the small cabinet to hold my hardware.

My lumber rack will be located above the jointer and my unfinished router table. I am making it out of 2x4's and 1/2" plywood, it is pretty simple but should do the job nicely.

Moving into my new shop I will be building lots of new shop furniture and jigs, most of which I will try to make videos on. This afternoon I hope to be able to complete my lumber rack and have a tutorial video made and uploaded by Wednesday. I already have all of the parts cut for the rack I just have to get to videoing!

Tuesday, January 11, 2011

The New Shop! Pt. 1

I am loading up my shop and moving it to a new home! Well, not yet, but I am getting close!

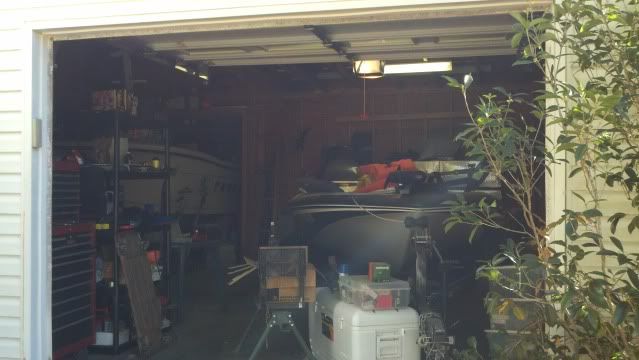
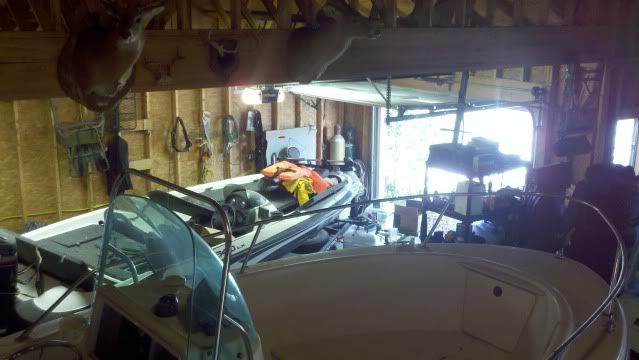
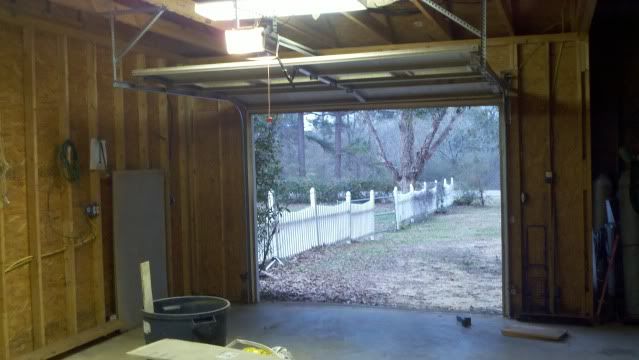
I have decided to move my shop to my home, since I have had a break-in and having a shop at home would be so nice (having to drive 20 minutes to my shop makes me spend less time there). The plan is to moving into a bay of our "boat barn", it is a larger garage if you will that is approximately 30'x60' and has a two boats, fourwheelers, a golf cart and a bunch of my step father's junk, yes, most of it is junk. Sadly I couldn't convince him to give me the whole thing, so I settled with one bay of it a 13.5'x25' section.


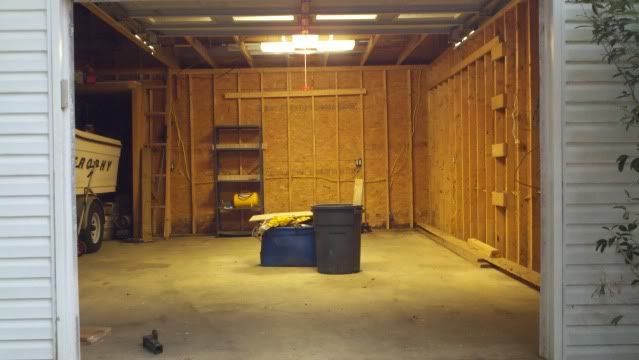
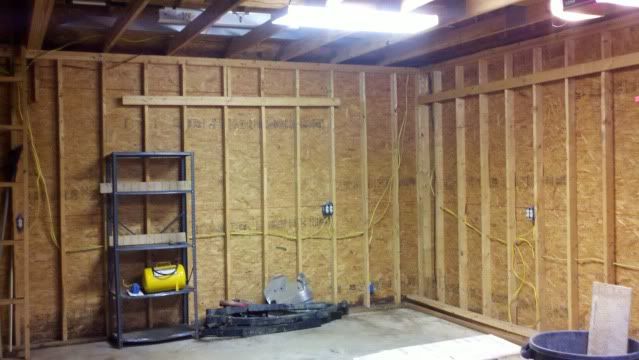
As you can see, it is pretty full. Most of the barn is this way, I think my stepdad is a mild hoarder..... alot of the stuff is... well I won't go there. I got him in there with me Sunday afternoon and consolidated all of the things into the other parts of the barn. Our agreement was that I could get 100% of his stuff out of that bay and have only my things over there. It took us probably a good hour to move it all, when we were done it was looking good.


My plans are to close it off completely from the rest of the barn with a nice wall. I want to insulate it, hang 1/2" plywood all along the walls, paint it white, then move all my tools in and build something! More to come!

Feel free to "Follow" along with me, this should be exciting! Look in the right column for "followers" and click follow.

Monday, January 3, 2011

How to build Cornhole Boards- A video Tutorial

Here is my video on how to make a nice set of cornhole boards. Everything is up to the tournament standards and these thing look nice. Not just some plywood and 2x4's.
Anyone can build these with just a few simple tools.


The pocket hole screws were my preferred method although you could simply screw from the outside of the 1x4 into the plywood deck, predrilling and glueing would be recommended. Nails would probably work in place of screws but I would be sure and put plenty of both nails and glue.

I hope you all enjoy!

Wednesday, December 29, 2010

DIY Plywood Cutting Table

I completed my video on my Plywood Cutting Table! I think I am getting a little better at making videos too. They are getting more precise and to the point with less rambling and less "uhhh....." "and uh..." in it. Also, I think I ended up with a much better quality picture in the video since I rendered it to different specs.

I hope everyone enjoy's the video and feel free to comment and ask questions if you have one!

Monday, December 20, 2010

Things to come!

I am happy to say that I have finally figured out a solution to my video camera problems!

It all started when my computer became infected with a virus and my computer needed to go to the shop because it was beyond my capabilities to repair. My mother, as a favor, sent my computer to the shop to have it cleaned up and somehow the message got across to the computer tech's to just wipe my hard drive clean, or at least one of them (my important one). So anyways, I receive my computer back and realize what has happened and that I have lost quite a bit of important files. One of those files being a program called HD Writer which is used to get the videos off of my camera. Well, I try to find the disc with the program on it but failed time and time again to locate it. So time goes on and after much searching all across the internet I find a new program that can do the job, for $34. It was either buy the program or basically toss the camera, I bought it.

The first thing I did was I took the videos I made of the construction of my folding sawhorses and edited them and uploaded them to YouTube and posted it here on my blog, the previous post actually. Hopefully that video will get out to some people who need a nice stable sawhorse that can be stored out of the way easily.

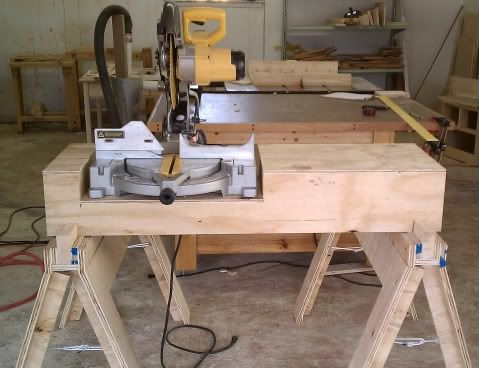
The next thing on my agenda is to get some footage of my "accessories" that I use on top of my sawhorses to make working MUCH easier. The first thing is my miter saw stand.


This thing is great, it gives me something to use with my miter saw that will support longer pieces and gives me a bit of a fence to help hold the stock I am cutting straight. More information on this coming soon in a video!

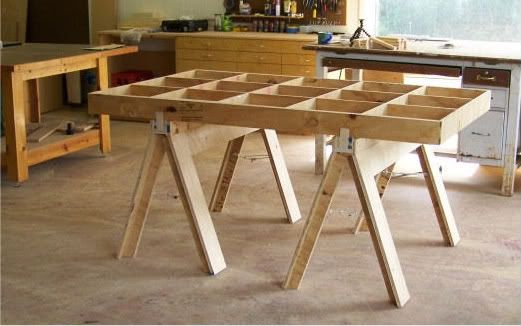
Then there is my plywood cutting table. Usually, when using sawhorses, I would lay one or two 2x4's across the tops of the horses to act as supports when cutting my plywood. Making this table was pretty simple and cheap, well worth the effort. It is good for more than just ripping plywood too, it's a great work table on the job and in the shop also.


This thing will be featured in a video soon also! Be sure and check back soon, the videos will be here on my blog and also on my YouTube channel.

Friday, July 9, 2010

DIY Folding Sawhorses - Version 2.0 with Free Plans

I am calling this free plans, I have the cutout photo of a sheet of plywood with the dimensions on it. The rest pretty straight forward I believe. But, while I was building this set I was video taping a how to video and hopefully that will be up and running online soon which should make everything very simple.

The original sawhorse design was a great one, the only things I really changed for the 2.0 version were the height of the horses, the width of the horses, and the width of the leg panels. The changes made now allow for nearly, if not all of the materials to be cut out of one sheet of plywood (on the computer it says it can be done, but when I tried I failed somehow). The working height could be lowered still to enable you to get everything out of one piece except for the 2x4 top piece, but that would lower the working height to a level to low for my personal preference.

The working height in version 2.0 is approximately 31" which uses a leg panel height of 28", and the width of the sawhorses are nearly 43". The width of a leg panels is 5" which allows you to cut two leg panels out of a 48"x33" section of 3/4" plywood. It may be difficult to understand but I will have a image of the cut list soon which will help clear everything up.

Everything else is the same as the original version.


I built a set of these about three of four weeks ago and have been using them on remodeling and construction jobs and they are holding up great. I have had easily over 100 8' pieces of tongue and groove pine on them along with a miter saw and they never showed any signs of weakness. Everyone who comes to the jobs takes a close look at the sawhorses and asks my boss man where he got them, it feels good when he points at me and says "He built them, not me".

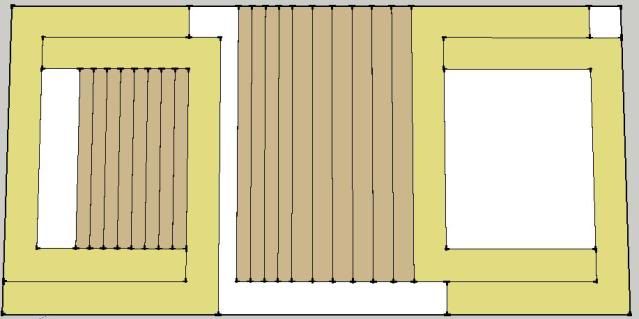
The construction is pretty simple and I think you should be able to simply recreate your own. I did however make a cut list type thing on Sketch up that shows how you can get the pieces easily out of one sheet of plywood.


The "U" shaped leg panels are 28" tall and about 42 15/16" long and 5" wide on all three segments. When it is laid out on a sheet of plywood I center my saw blade on the line since I am using both pieces on either side of the blade.

The rest is pretty easy, 6 pieces 3" x about 42 15/16" (four of them with an 18* bevel cut down one long side) and 4 at 2". Then from the inside of a leg you cut 8 pieces that are used for the inside of the legs for support.

Here is a video helping with the building process. I go into some detail about assembly and remind you of a few things, check it out.


More detailed photo's and descriptions are availiable in this post that should aid in the the building process.

If anyone has and questions of comments feel free. Don't forget about The Woodworking Trip, there should be a video on these things coming soon. Thank you!

Thursday, June 3, 2010

DIY Folding Sawhorses- First Design

Sawhorses, every shop needs them, everyone probably needs another set. I know I do but I wanted something different, something that was easy to store, not to heavy, very sturdy, and all one piece. I have been wanting a set like these for a while and I have looked on the internet for different plans and different designs but I could never find anything I really liked.

(The following is a little story leading up to these sawhorses, feel free to skip down a bit)
Here recently I was working with my cousin who owns a construction company and he has an enclosed trailer that he hauls his tools around in. He also just recently had to let an employee of 6 years go due partly to the economy and partly to performance. One thing about the past employee is keeping things neat and organized (or so my cousin claims, but he doesn't have much room to talk). Anyways, the enclosed trailer is about a 14x8 I would guess and is full of tools, nails, hoses, chords and a bunch of other stuff that has no business being in there or either needs to be thrown out. One thing is a set crappy saw horses that are beyond their prime and are just thrown in on top of everything else. This situation got me thinking I need to give him a set of folding saw horses.

So with the sawhorses on my mind I was watching a video of a fellow woodworker's on Lumberjocks, where he was building a computer table out of plywood which somehow made a light bulb go on in my head.

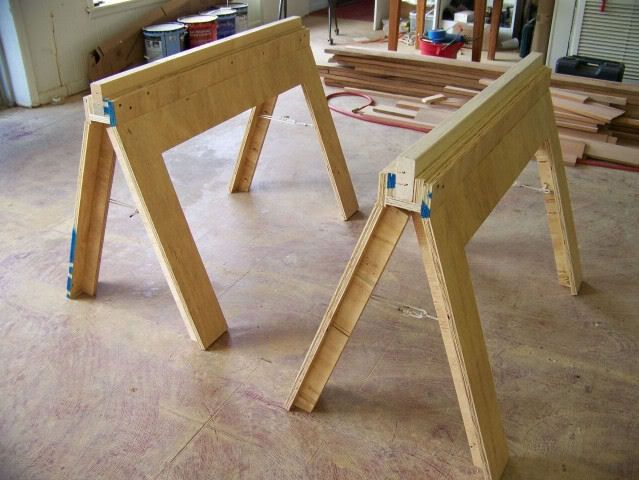
The problem with alot of lightweight sawhorses is that they wobble, I hate when they wobble. So I thought I could make the legs on each side out of one piece of plywood that way they would not wobble. Then I got on Google Sketchup and came up with these versatile folding sawhorses.


Click on any image to make it larger.

I have only built the one so far but it's great. It took some time to work a few kinks out but here they are. They aren't very heavy and you could easily carry two at one time, I think the leg frames could be made a bit narrower without any problem which would make them even lighter.

One thing I wanted which I have seen on a few other horses is a replaceable top board because they get cut up so easily after a while. You can also have different boards for different applications like a large clamping surface or a panel cutting jig.


They fold up nicely and are only about 4" wide. All you have to do is lift them up and they close right up, no block or pin to remove. They set up easily, just set them on the ground and ease out one leg and that's it.


They aren't very complicated, just some plywood, hinges, and some rope.


I hope other people like them as much as I do. If people find it difficult to copy them then I would be happy to redraw them up in Sketchup or even make a video on them. So let me know what you think, feel free to comment!